Home Maintenance

  • Why Is My House So Drafty? 9 Places Cold Air Sneaks In

    Why Is My House So Drafty? 9 Places Cold Air Sneaks In

    Your thermostat says the house is warm.

    Then you walk past one particular spot and suddenly you’re standing in February.

    If you’re wondering why your house is so drafty, don’t immediately assume you need new windows, more insulation, or an expensive HVAC repair. Houses have a surprising number of places where outside air can sneak through, and some of the biggest offenders aren’t the places you’d expect.

    Before you start pricing replacement windows, here are nine places worth checking.

    1. Exterior Doors

    Start with the obvious one.

    Weatherstripping doesn’t last forever. Over time it can compress, tear, loosen, or simply stop making good contact with the door. The sweep along the bottom can wear out too.

    On a cold or windy day, slowly run your hand around the perimeter of a closed exterior door. Pay particular attention to the bottom corners and the latch side.

    And if you can see daylight around a closed door, congratulations. That mystery wasn’t particularly difficult.

    For moving parts such as doors, weatherstripping is generally the appropriate solution. Caulk is better suited to stationary cracks and joints.

    2. Around Window Frames

    Feeling cold near a window doesn’t automatically mean you need a new window.

    Sometimes the air is actually leaking around the frame.

    A window sits inside a larger opening in the wall. If gaps around that opening weren’t sealed properly, or the existing seal has deteriorated, outside air can find its way around an otherwise functional window.

    That’s an important distinction.

    Replacing an entire window to solve a small gap around the frame is a spectacularly expensive way to buy some caulk.

    3. Electrical Outlets and Switches

    This one surprises people.

    Electrical boxes interrupt the wall assembly. On exterior walls, gaps around those boxes and the wiring running through them can provide a path for air movement.

    During cold weather, put your hand near outlets and switches located on exterior walls.

    If one feels noticeably colder than the surrounding wall, it’s worth investigating.

    Don’t start stuffing random materials into electrical boxes. There are products designed specifically for sealing around outlets and switches.

    4. Attic Access Doors and Pull-Down Stairs

    That little rectangle in your ceiling can be a pretty substantial hole between your living space and the attic.

    Attic hatches and pull-down stairs need to be both insulated and air sealed.

    If the hatch doesn’t close tightly, warm indoor air can escape around its edges while colder attic air finds its way toward the living space.

    Weatherstripping around the opening can help create a tighter seal when the hatch is closed.

    And because warm air naturally rises, leaks near the top of the house can have an outsized effect.

    5. Recessed Lights and Other Ceiling Openings

    Your ceiling probably has more holes in it than you realize.

    Recessed lights, wiring, plumbing pipes, bathroom exhausts, vents, and other penetrations can create pathways between conditioned living space and the attic.

    Some of those openings are tiny.

    The problem is that a house can have a whole lot of tiny openings.

    Don’t automatically attack every ceiling penetration with a can of spray foam, though. Certain light fixtures, flues, chimneys, and other heat-producing components require specific clearances and approved materials.

    Fire safety beats winning an argument with a draft.

    6. Rim Joists and Sill Plates

    Now head downstairs.

    The rim joist runs around the perimeter of the floor framing where the house meets the foundation. The sill plate sits at the transition between the wood framing and foundation.

    These areas contain plenty of seams, joints, and penetrations where outside air can sneak into the house.

    If you have an unfinished basement, the rim-joist cavities may be exposed and relatively easy to inspect.

    This is one of those places homeowners rarely think about because nobody walks into the basement, stares at the rim joist, and thinks, That’s probably why my feet are cold.

    But it can matter.

    7. Plumbing and Utility Penetrations

    Every pipe, wire, cable, or vent that passes through an exterior wall needed a hole.

    Sometimes the hole is considerably larger than whatever is running through it.

    Look around:

    • Outdoor faucets
    • Plumbing pipes
    • Cable and internet lines
    • Electrical penetrations
    • Dryer vents
    • HVAC lines

    You may find visible gaps around some of them.

    One tiny opening isn’t necessarily dramatic. Add dozens of small leaks throughout the building envelope, though, and they can collectively move a surprising amount of air.

    8. Fireplace and Chimney Areas

    Fireplaces are another potential source of unwanted airflow.

    An open or poorly sealing damper is the obvious culprit, but leakage can also occur around the fireplace structure or where a chimney passes through the house.

    If you have a fireplace you rarely use and that part of the room always feels cold, it’s worth investigating.

    Because fireplaces and chimneys involve combustion and high temperatures, use materials specifically approved for the application or have questionable areas inspected professionally.

    Ordinary spray foam and confidence are not a fire-safety system.

    9. The Garage-to-House Boundary

    If you have an attached garage, don’t forget about the wall and door separating it from your living space.

    Check the weatherstripping around the door leading into the house and look for obvious penetrations or gaps along shared walls and ceilings.

    This area matters for more than temperature.

    The garage should be properly separated from the home’s living space, so significant gaps or questionable construction deserve more attention than simply trying to make the room warmer.

    How to Find Drafts in Your House

    The easiest time to hunt for air leaks is during cold or windy weather. The temperature and pressure differences make leaks much easier to notice.

    Start with the accessible areas:

    Exterior doors. Window frames. Attic access. Exterior-wall outlets. Utility penetrations.

    You can often identify obvious trouble spots just by carefully feeling for moving air.

    For a much more thorough assessment, consider a professional home energy audit. A blower-door test depressurizes the house so technicians can measure leakage and locate air paths that aren’t obvious during a walk-through.

    The U.S. Department of Energy has a useful overview of professional home energy assessments and what they can uncover:

    U.S. Department of Energy: Home Energy Assessments

    Should You Replace Drafty Windows?

    Not automatically.

    A window can feel cold for several different reasons.

    The glass itself may simply be cold. Air may be leaking through part of the window assembly. Or outside air may be entering around the window frame.

    Those are different problems.

    If the window operates properly and the problem is a gap around its perimeter, air sealing may be all that’s required.

    If the window itself is damaged, deteriorated, poorly installed, or failing, replacement may eventually make sense.

    The important part is figuring out where the air is actually coming from before spending thousands of dollars.

    Don’t Forget the HVAC System

    Not every cold spot is actually a draft.

    Poor airflow, blocked registers, duct problems, dirty HVAC filters, and heating-system issues can create rooms or areas that feel colder than the rest of the house.

    If you haven’t checked your filter lately, start here:

    How Often Should You Change Your HVAC Filter?

    And if the problem you’re noticing around your windows is water rather than moving cold air, that’s a different issue. See:

    Why Are My Windows Sweating? What Window Condensation Is Telling You

    For another indoor-air culprit:

    Why Is My House So Dusty? 9 Places All That Dust Is Coming From

    The Bottom Line

    If your house feels drafty, don’t immediately assume you need new windows or a larger heating system.

    Start by looking for the pathways that allow air to move between your comfortable indoor space and the cold places surrounding it.

    Doors and windows deserve attention, but so do attic hatches, utility penetrations, electrical boxes, ceiling openings, rim joists, fireplaces, and attached garages.

    A dozen boring little gaps can collectively create a surprisingly big comfort problem.

    Find the leaks first.

    Then spend money fixing the actual problem instead of throwing expensive upgrades at a cold room and hoping one of them works.

    FAQ

    Why is my house drafty even with new windows?

    The windows may not be the source. Air can leak around the window frames, exterior doors, attic access, utility penetrations, electrical boxes, and other openings in the home’s air barrier.

    What’s the easiest way to find drafts in a house?

    Check around exterior doors, windows, outlets, attic access, and utility penetrations during cold or windy weather. For a more comprehensive evaluation, a professional energy audit with blower-door testing can identify less obvious air leaks.

    Should I use caulk or weatherstripping to stop drafts?

    Generally, use caulk for stationary cracks and joints and weatherstripping for components that move, such as doors and operable windows.

    Can sealing air leaks make my house more comfortable?

    Yes. Reducing uncontrolled outside-air leakage can help reduce drafts and make indoor temperatures more consistent, particularly around exterior walls and other leakage points.

    Do drafty windows always need to be replaced?

    No. The leak may be around the window frame rather than through the window itself. Identify the source before deciding whether air sealing, repair, or full replacement makes sense.


  • Why Are My Windows Sweating? What Window Condensation Is Telling You

    Why Are My Windows Sweating? What Window Condensation Is Telling You

    If your windows look like somebody took a hot shower in the living room, your house is trying to tell you something.

    That water isn’t leaking through the glass. In most cases, it’s condensation caused by warm, humid indoor air meeting a cold window.

    A little condensation every once in a while isn’t necessarily a crisis. But windows that are constantly wet, dripping onto the sill or developing mold around the frame deserve some attention.

    The good news is that you can usually narrow down what’s causing it without tearing apart the house.

    Why Does Condensation Form on Windows?

    Think about a cold drink sitting outside on a summer day.

    The water on the outside of the glass didn’t leak through from inside the cup. Moisture in the surrounding air cooled against the cold surface and condensed into water.

    Your windows can do the same thing.

    During colder weather, the inside surface of your window can become much colder than the air inside your house. When warm indoor air containing enough moisture reaches that cold glass, some of that moisture turns into liquid water.

    That’s the “sweating” you’re seeing.

    The colder the window gets and the more moisture that’s floating around inside the house, the easier condensation forms.

    Why Does It Suddenly Get Worse in Fall and Winter?

    You may have the same amount of moisture inside your house for months without noticing anything unusual.

    Then the temperature outside drops.

    Now the glass is colder.

    That colder surface can be enough to turn an invisible humidity problem into visible droplets running down the window.

    This is also why you might notice condensation first thing in the morning. The outdoor temperature may have dropped overnight while people inside the house were breathing, showering and adding moisture to the air.

    Your house didn’t suddenly start producing water.

    The conditions finally became right for you to see it.

    1. Your Indoor Humidity May Be Too High

    This is the first thing I’d check.

    The EPA recommends keeping indoor relative humidity below 60%, and ideally between about 30% and 50% when possible.

    That doesn’t mean 50% humidity is automatically appropriate for every house in every season.

    When it’s extremely cold outside, you may need lower indoor humidity to prevent condensation from forming on cold surfaces.

    A cheap indoor humidity meter, usually called a hygrometer, can tell you where you’re starting.

    If the house is sitting at 60% humidity while it’s freezing outside and the windows are soaked every morning, you’ve found a pretty big clue.

    2. Showers Add a Lot of Moisture

    Bathrooms are basically small indoor weather systems.

    Take a hot shower, and all that steam has to go somewhere.

    A properly working bathroom exhaust fan should move moist air outside rather than letting it spread through the rest of the house.

    Run the fan while showering and leave it running for a while afterward.

    Also check that the fan actually vents outdoors.

    A fan that sounds impressive but moves very little air isn’t accomplishing much. Neither is one dumping moist bathroom air into an attic.

    3. Cooking Can Raise Humidity Too

    Boiling pasta, simmering soup and cooking on the stove all release moisture.

    One dinner isn’t going to turn your house into a rainforest, but repeated moisture from cooking can contribute to an already humid house.

    Use your range hood when you’re producing a lot of steam, particularly if the hood vents outdoors.

    And yes, this means the range hood has another purpose besides making noise while you’re trying to hear the television.

    4. Laundry and Dishwashing Add Moisture

    Laundry can contribute moisture too, particularly if you’re drying clothes indoors.

    Make sure your clothes dryer vents properly to the outdoors and inspect the vent periodically for restrictions or disconnected ductwork.

    Dishwashers also release warm, moist air, particularly when they’re opened immediately after a hot cycle.

    None of these things alone necessarily explains soaked windows.

    Together, though?

    Showers + cooking + laundry + people + pets + a closed-up house can add a surprising amount of moisture.

    5. Your Curtains or Blinds May Be Making It Worse

    This one is easy to overlook.

    Heavy curtains and tightly closed blinds can reduce air circulation across the window.

    The glass stays cold while moist air becomes trapped nearby.

    Then you open the curtains in the morning and discover your own little indoor pond.

    Try leaving blinds slightly open or giving air more room to circulate around problem windows.

    This doesn’t eliminate the underlying moisture, but it can help reduce the conditions that encourage condensation.

    6. Your House May Not Be Moving Enough Air

    Sometimes the problem isn’t simply how much moisture exists.

    It’s where that moisture is collecting.

    Rooms with poor airflow can develop different humidity and temperature conditions from the rest of the house.

    Keep supply registers open unless your HVAC system was specifically designed otherwise, and don’t block returns with furniture.

    Ceiling fans can also help keep room air moving.

    If you’re already fighting dust and wondering whether the HVAC system is part of the problem, I covered several related issues in Why Is My House So Dusty? 9 Places All That Dust Is Coming From.

    7. Your Windows May Simply Be Very Cold

    Indoor humidity isn’t the entire story.

    Window temperature matters too.

    Older single-pane windows generally have much colder interior glass surfaces during winter than modern insulated windows. Even insulated windows can develop condensation when outdoor temperatures get low enough.

    Storm windows, better air sealing and improved windows can raise the temperature of that interior surface and make condensation less likely.

    But I wouldn’t immediately replace every window because you found some moisture on the glass.

    Check the humidity first.

    A brand-new window can’t repeal physics.

    Condensation Inside vs. Outside vs. Between the Glass

    Where the water appears matters.

    Condensation on the inside of the window

    This usually points toward indoor humidity meeting cold glass.

    That’s the situation most of this article addresses.

    Condensation on the outside

    Exterior condensation can happen when the outside surface of the glass is colder than the outdoor dew point.

    Oddly enough, this isn’t necessarily a sign of a bad window.

    Well-insulated windows can sometimes develop exterior condensation because less heat from inside the house reaches the exterior pane.

    Condensation between the panes

    This is different.

    If you have double- or triple-pane insulated windows and moisture or fog appears between the panes where you can’t wipe it away, the insulated glass seal may have failed.

    Lowering the humidity in your house won’t repair a failed window seal.

    That’s when I’d start looking at the window itself rather than chasing the thermostat around the house.

    When Should You Worry About Window Condensation?

    An occasional little fog around the bottom of a window is different from water running down the wall every morning.

    Pay closer attention if you’re seeing:

    • Water pooling on window sills
    • Peeling or bubbling paint
    • Swollen or damaged wood
    • Persistent musty smells
    • Mold growth
    • Wet drywall
    • Condensation covering large portions of multiple windows every day

    Repeated moisture can eventually damage the materials surrounding the window.

    The EPA’s basic advice on moisture problems is pretty straightforward: control the moisture source and dry wet materials rather than allowing damp conditions to continue.

    EPA guidance on mold and moisture in the home

    How to Reduce Condensation on Your Windows

    You don’t need to attack every possible cause at once.

    Start with the simple stuff.

    1. Measure your indoor humidity. Don’t guess. A hygrometer will tell you whether excess humidity is an obvious part of the problem.
    2. Use bathroom exhaust fans. Run them during showers and afterward.
    3. Use your kitchen exhaust. Especially when boiling water or producing a lot of steam.
    4. Check the dryer vent. Make sure warm, damp dryer air is actually reaching the outdoors.
    5. Improve airflow around windows. Open curtains and blinds enough to let room air circulate.
    6. Wipe up standing water. Don’t repeatedly leave water sitting on wood, drywall or window trim.
    7. Use a dehumidifier if necessary. If humidity remains high despite addressing obvious sources, mechanical dehumidification may help.
    8. Investigate persistent problem areas. One constantly wet window while every other window stays dry could point toward an issue specific to that window or room.

    If your HVAC system is also struggling with airflow or indoor-air issues, don’t forget the filter. Dad Approved’s HVAC Filter Guide: MERV Ratings, Sizes & When to Change It explains what the ratings mean and why simply buying the highest-number filter isn’t always the answer.

    What About a Humidifier?

    This is where things get interesting.

    Winter air can become uncomfortably dry, so plenty of homes use humidifiers.

    There’s nothing inherently wrong with that.

    But if you’re running a humidifier while water is streaming down your windows every morning, your house is giving you some fairly unsubtle feedback.

    Turn the humidity setting down and see what happens.

    The goal isn’t to make the house as dry as possible. It’s to find a comfortable indoor humidity level that doesn’t continually create condensation on cold surfaces.

    That target can change as outdoor temperatures change.

    Don’t Just Keep Wiping the Windows

    Wiping condensation away is useful because you don’t want water sitting against the sill or trim.

    But that’s cleanup.

    It’s not diagnosis.

    If the windows are wet again tomorrow morning and the morning after that, figure out why.

    Check the humidity. Use the exhaust fans. Look at airflow. Pay attention to which windows are affected and when the condensation appears.

    Your windows aren’t necessarily the problem.

    Sometimes they’re just the easiest place to see what’s happening elsewhere in the house.


    Frequently Asked Questions

    Why do my windows have condensation every morning?

    Overnight outdoor temperatures often fall while people inside the house continue adding moisture through breathing, showering and normal household activity. If the interior glass becomes cold enough, moisture in the indoor air can condense on it.

    Does condensation mean I need new windows?

    Not automatically.

    High indoor humidity can cause condensation even on good windows when conditions are right.

    However, moisture trapped between panes of insulated glass can indicate a failed seal.

    Will a dehumidifier stop condensation on windows?

    It can help if excessive indoor humidity is contributing to the problem.

    Before buying one, measure your humidity and address obvious moisture sources such as bathroom ventilation, cooking, indoor clothes drying or dryer-vent problems.

    Is condensation on windows dangerous?

    A small amount of occasional condensation isn’t necessarily dangerous.

    Persistent water is more concerning because repeated moisture can damage window trim, paint, drywall and other materials and create conditions that support mold growth.

    What humidity should my house be in winter?

    There isn’t one perfect setting for every house and outdoor temperature.

    The EPA generally recommends keeping indoor relative humidity below 60%, ideally around 30% to 50%. During very cold weather, your home may need to stay toward the lower end to prevent condensation on cold surfaces.


    The Dad Approved Bottom Line

    If your windows are sweating, don’t immediately assume the windows are bad.

    Start with the house.

    Measure the humidity. Run the exhaust fans. Check the dryer vent. Give air room to circulate around the glass. Pay attention to whether the moisture is on the room side of the window or trapped between the panes.

    Most importantly, don’t ignore water that keeps coming back.

    A wet window is easy to wipe off.

    Water damage around one is considerably less fun.


  • Why Is My House So Dusty? 9 Places All That Dust Is Coming From

    Why Is My House So Dusty? 9 Places All That Dust Is Coming From

    You dust the furniture on Saturday.

    By Tuesday, you can write your name on the TV stand again.

    At some point, you start wondering whether your house is producing dust as a side business.

    It isn’t. Probably.

    Household dust is a mixture of a lot of things: outdoor dirt and pollen, pet dander, human skin and hair, mold spores, dust mites, particles from cooking and cleaning, and even particles created by burning candles.

    If your house seems way dustier than it should be, though, there are some places worth checking.

    1. You’re Bringing Dirt Into the House

    Some of the dust in your house started outside.

    Every time a door opens, outdoor particles have another opportunity to come inside. Then there are shoes, kids, dogs, backpacks, packages and everything else crossing the floor.

    Nobody wipes their feet as thoroughly as they claim.

    What helps: Use decent entrance mats, take shoes off near the door if that works for your family, and vacuum high-traffic areas regularly.

    You aren’t going to establish an airlock at the front door. The goal is simply to stop some of the outdoors from becoming part of the indoors.

    2. Pets Are Tiny Dust Factories

    I say this as someone living in a house with pets.

    They’re adorable.

    They’re also contributing to the problem.

    Pet dander and hair become part of the material collecting around your home. And unlike a dusty bookshelf, pets move. They’re constantly helping redistribute whatever has settled onto floors and furniture.

    What helps: Vacuum carpets and upholstered furniture regularly, wash pet bedding, clean the areas where pets spend the most time and keep up with grooming.

    If you have several animals, you’re simply going to have a higher dust workload than somebody living alone with a goldfish.

    That’s the deal we apparently signed.

    3. Your HVAC Filter or Ductwork May Be Part of the Problem

    Your HVAC system moves a lot of air through your house, so it’s worth checking when dust seems excessive.

    Start with the obvious: the filter.

    A dirty, poorly fitted or inadequate filter can allow more particles to keep circulating. Your filter’s MERV rating matters too. MERV stands for Minimum Efficiency Reporting Value, and higher ratings generally capture smaller particles more effectively.

    But the filter isn’t the only potential issue.

    Leaky Ductwork Can Pull Dust From Places You Don’t Want It

    If your duct system has leaks, particularly on the return side, it can pull unfiltered air from spaces such as an attic, crawlspace, basement, garage or wall cavity and introduce those particles into the HVAC system.

    That can mean you’re cleaning the house while the HVAC system keeps helping bring more dust into circulation.

    The U.S. Department of Energy notes that sealing duct leaks can improve indoor air quality by reducing the chance of ducts drawing in contaminants from areas such as attics, crawlspaces and garages.

    Signs worth investigating include:

    • One room becoming noticeably dustier than others
    • Dust collecting unusually quickly around supply registers
    • Visible gaps or disconnected ductwork
    • Return-air leaks
    • Ducts running through dusty unfinished spaces
    • Filters becoming dirty unusually quickly

    Don’t assume dusty registers automatically mean you need professional duct cleaning, either. The problem may be air leakage, not dirty duct interiors.

    4. Don’t Automatically Buy the Highest-MERV Filter on the Shelf

    The internet version of HVAC advice sometimes boils down to:

    More MERV = more better.

    Not quite.

    Your system still has to move air through the filter. The EPA recommends using the highest-rated filter that your system’s fan and filter slot can accommodate. (US EPA)

    There’s also something much simpler worth checking:

    Does the filter actually fit?

    A good filter won’t accomplish nearly as much if air can bypass it around the edges.

    Make sure you’re buying the correct dimensions and that the filter sits properly in its slot.

    If you’re considering a major jump in filter efficiency and aren’t sure what your equipment can handle, check the HVAC manufacturer’s recommendations or ask an HVAC technician.

    5. Your Vacuum May Be Putting Some Dust Back Into the Air

    Vacuuming removes dust.

    It also disturbs it.

    Walking, sweeping, dusting and vacuuming can kick settled particles back into the air. The EPA recommends frequent cleaning and suggests damp-dusting surfaces so you’re actually capturing settled dust instead of launching it back into circulation.

    A vacuum with good filtration can help too.

    And don’t attack a dusty room with a feather duster unless your goal is relocating the dust six feet to the left.

    6. Your Carpet, Furniture and Bedding Are Holding Onto It

    Soft surfaces are excellent dust storage facilities.

    Carpets, rugs, couches, mattresses, curtains and bedding collect particles over time. Then people, pets and normal household activity disturb them again.

    Vacuum carpets and upholstered furniture regularly. Wash bedding and pet bedding. Don’t forget the areas that aren’t obvious, like underneath beds and furniture.

    Bedrooms can be surprisingly dusty because they’re packed with fabric, clothing, pillows and blankets.

    Plus there’s a human being spending roughly eight hours every night shedding skin and hair into the room.

    Very relaxing thought.

    You’re welcome.

    7. Cooking and Candles Create Particles Too

    Not everything you call “dust” arrived as dirt.

    Some particles are created inside the house.

    Cooking, burning candles, fireplaces and certain cleaning activities can all contribute to indoor particulate matter.

    This doesn’t mean you have to declare war on dinner or throw every candle into the yard.

    It just means your house isn’t a sealed container. Everyday life continuously adds particles to the indoor environment.

    Using a range hood that vents outdoors while cooking can help reduce cooking-related particles.

    8. Humidity and Moisture Can Add to the Problem

    Humidity doesn’t magically manufacture ordinary household dust, but excessive moisture can encourage things you definitely don’t want becoming part of it.

    Most notably: mold and dust mites.

    If your house regularly feels damp, you’re seeing condensation, or you have musty areas, investigate the moisture problem rather than treating it as a cleaning problem.

    Bathroom exhaust fans, kitchen ventilation, fixing water leaks and using a dehumidifier where appropriate can all help control excess moisture.

    9. Your House May Simply Produce a Lot of Dust

    This one gets overlooked.

    Compare these two houses:

    House A: Two adults, no pets, mostly hard flooring.

    House B: Six people, dogs, cats, carpet, kids running upstairs, doors opening constantly, cooking every day and enough laundry to qualify as light industrial activity.

    Those houses aren’t going to accumulate dust at the same rate.

    More people and animals mean more hair, skin particles, fibers and tracked-in dirt. More activity also means more settled material getting kicked back into the air.

    Sometimes the answer isn’t that something is broken.

    Your house is just busy.

    What I’d Check First

    If my house were getting dusty ridiculously fast, I wouldn’t immediately pay for duct cleaning or start buying miracle gadgets.

    I’d start with the boring stuff:

    1. Check the HVAC filter. Make sure it’s clean, properly fitted and appropriate for the system.
    2. Vacuum carpets and upholstered furniture regularly.
    3. Damp-dust surfaces instead of simply pushing particles around.
    4. Wash bedding and pet bedding regularly.
    5. Reduce the dirt being tracked inside.
    6. Check for excessive indoor humidity or moisture problems.
    7. Pay attention to where the dust is worst. If one room gets dramatically dustier than the rest of the house, investigate what’s different about that room.

    Only after doing those things would I start spending money trying to solve the problem.

    What About an Air Purifier?

    A portable air cleaner can help capture particles that are actually airborne, particularly when it’s properly sized for the room.

    If you’re shopping for one, you’ll commonly see HEPA filtration advertised.

    A true HEPA filter is designed to capture at least 99.97% of airborne particles at 0.3 microns, with larger and smaller particles captured at even greater efficiency. (US EPA)

    That’s impressive, but an air purifier still isn’t a magic dust eraser.

    It can’t vacuum your carpet.

    It can’t wash the dog bed.

    It can’t stop dirt from coming through the front door.

    And it can’t capture dust that’s already sitting underneath your couch plotting its return.

    Think of filtration as another tool, not a replacement for controlling the sources of the dust.

    The Dad Approved Bottom Line

    If your house gets dusty fast, buying a stronger HVAC filter or expensive air purifier isn’t automatically the answer.

    Dust is coming from outside, your family, your pets, fabrics, cooking, cleaning and normal life inside the house.

    Start by reducing what gets tracked or generated inside. Then make sure your HVAC filter fits properly and is appropriate for your system. Clean the places where dust collects, and use additional air filtration where it actually makes sense.

    And if you clean on Saturday and find dust again on Tuesday?

    Congratulations.

    You still live in a house.

    Infographic titled "9 COMMON CAUSES OF INDOOR DUST & AIRBORNE PARTICLES" listing: 1 Outdoor Dirt & Pollen Tracked Inside; 2 Pets: Hair & Dander; 3 HVAC Filter Issues or Inadequate Filtration; 4 Using Too High a MERV Filter / Poor Filter Fit; 5 Vacuuming & Cleaning Kicking Up Dust; 6 Carpets, Furniture & Bedding; 7 Cooking & Candles; 8 Humidity & Moisture Problems; 9 Normal Household Activity.
    This infographic highlights nine common household sources of indoor dust and airborne particles.

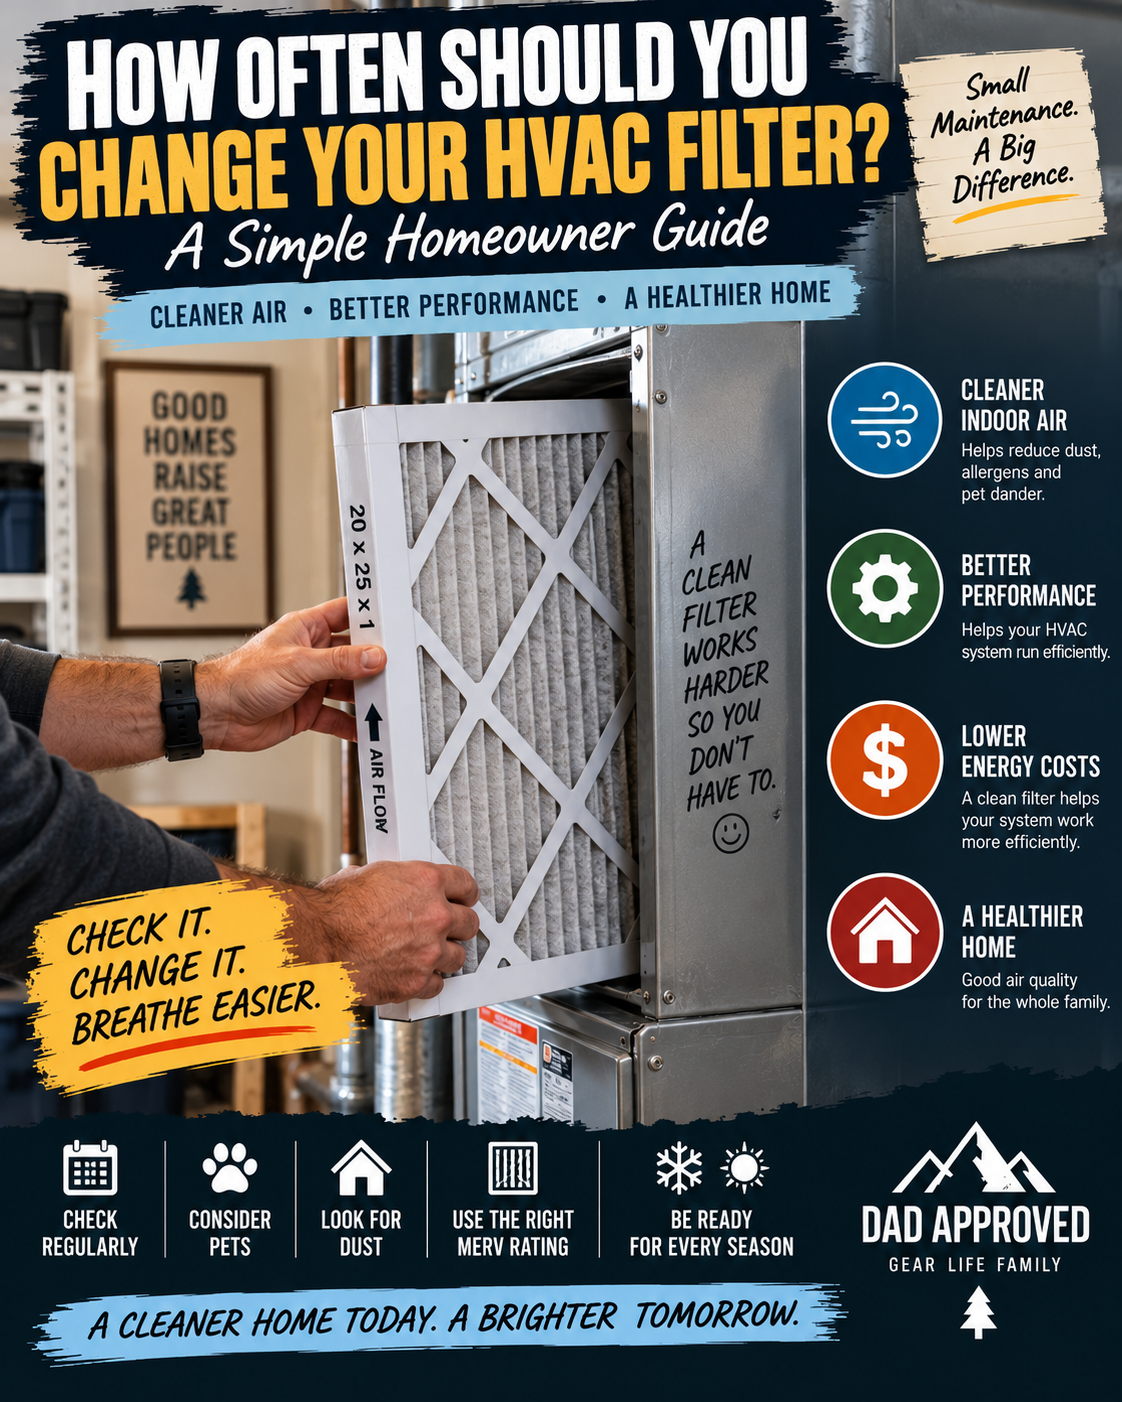
  • How Often Should You Change Your HVAC Filter? A Simple Homeowner Guide

    How Often Should You Change Your HVAC Filter? A Simple Homeowner Guide

    How often should you change your HVAC filter? If you’ve ever looked at the package, heard advice from an HVAC technician, and then searched online, you’ve probably received three different answers.

    Every 30 days.

    Every 90 days.

    Every six months.

    Very helpful.

    The problem is that there isn’t one replacement schedule that works for every house. Filter thickness, HVAC runtime, pets, dust, outdoor air conditions and the filter itself can all affect how quickly it loads up.

    The better approach is simple: check the filter regularly and replace it based on its condition and the manufacturer’s recommendations.

    ENERGY STAR recommends checking HVAC filters every month, particularly during heavy-use seasons, and replacing them when dirty. It recommends changing them at least every three months as a general baseline. (ENERGY STAR)

    Here’s how to figure out what makes sense in your house.

    🌬️ How Often Should You Change Your HVAC Filter?

    For many residential filters, 60 to 90 days is a common manufacturer recommendation, according to the EPA. But the EPA also points out that several factors determine how quickly a filter becomes dirty and recommends replacing it more frequently if it’s heavily soiled by replacement time. (US EPA)

    That’s why I wouldn’t write “CHANGE EVERY 90 DAYS” on the furnace with a permanent marker.

    Instead:

    Check it monthly.

    If it’s dirty, replace it.

    If it still looks relatively clean, keep using it while staying within the filter manufacturer’s replacement guidance.

    That’s considerably more useful than treating Day 90 like your filter suddenly turns into a pumpkin.

    📅 Why Every 90 Days Isn’t a Universal Rule

    Two identical filters installed in two different houses can have very different lives.

    Think about what the filter is dealing with.

    One home might have two adults, no pets, little dust and an HVAC system that barely runs during mild weather.

    Another might have a large family, several pets, doors opening constantly and an HVAC system running for hours every day.

    Those filters aren’t doing the same job.

    Your replacement schedule can also change throughout the year. ENERGY STAR specifically recommends monthly inspections during heavy-use months in winter and summer. (ENERGY STAR)

    So don’t get too attached to a calendar.

    The filter itself gets a vote.

    📏 Does HVAC Filter Thickness Matter?

    Yes, but don’t assume that a thicker filter automatically means you can leave it installed forever.

    Residential HVAC filters commonly range from about 1 to 5 inches thick, according to the EPA. (US EPA)

    Thicker media filters are physically different from the common 1-inch filters found in many systems and may have different manufacturer-recommended replacement intervals.

    The important part is using the type your system was designed to accept.

    Don’t try to wedge a 4-inch filter into a 1-inch slot because the internet told you thicker filters last longer.

    Your HVAC system is not a toaster.

    Use the proper filter dimensions and follow the manufacturer’s instructions for that filter and system.

    🐕 Do Pets Mean Changing HVAC Filters More Often?

    They certainly can.

    Dogs and cats introduce hair, dander and additional particles into a home. More material circulating through the HVAC system means more material available for the filter to capture.

    That doesn’t mean every pet owner needs to replace a filter every 30 days.

    It means pet households should pay closer attention to actual filter condition instead of assuming the longest advertised replacement interval will work for them.

    If you inspect the filter after a month and it already looks heavily loaded, you’ve learned something useful about your house.

    Check the next one sooner.

    The same principle applies to larger households and homes with a lot of activity.

    Your filter doesn’t care what the package promised.

    It knows how you live.

    🧹 What If Your House Gets Dusty Quickly?

    Heavy dust is another reason to inspect the filter more frequently.

    But there’s an important distinction here:

    Your HVAC filter is primarily part of the HVAC system. It isn’t a magical whole-house cleaning machine.

    A filter that becomes dirty unusually quickly could simply reflect conditions inside the home, heavy HVAC runtime or other environmental factors.

    If you’re constantly replacing heavily loaded filters or noticing unusual amounts of dust despite normal cleaning, it may be worth looking beyond the filter itself.

    Check for obvious problems and consider asking an HVAC professional whether the system has airflow, ductwork or filtration issues that deserve attention.

    Don’t automatically solve every dust problem by buying the most restrictive filter on the shelf.

    Which brings us to MERV.

    🔢 What MERV Rating Should You Use?

    MERV stands for Minimum Efficiency Reporting Value.

    It measures a filter’s ability to capture particles in certain size ranges. Higher MERV ratings indicate greater capture efficiency for those tested particle sizes. (US EPA)

    That leads to an easy assumption:

    Higher number = always better.

    Not quite.

    The EPA recommends MERV 13, or the highest efficiency filter that your HVAC system’s fan and filter slot can accommodate. The agency also notes that homeowners may need an HVAC professional to determine what’s appropriate for a particular system. (US EPA)

    So don’t choose a filter based solely on the biggest number printed on the package.

    Check your equipment documentation or ask your HVAC professional what the system is designed to handle.

    A $25 filter isn’t an upgrade if your system doesn’t like breathing through it.

    🔥 Should You Change Your HVAC Filter Before Heating Season?

    Check it before heating season.

    Whether it actually needs replacement depends on its condition and the manufacturer’s guidance.

    That’s an important difference.

    If your filter is already dirty after a summer of air-conditioning use, replacing it before the heating system starts working hard makes sense.

    If you recently installed a filter and it’s still in good condition, there’s no prize for throwing it away simply because the calendar says September.

    This also pairs nicely with a general fall HVAC check.

    When you’re testing the heat before winter, walk over and inspect the filter too.

    Two-minute job.

    No toolbox required.

    Those are the best kind.

    👀 How Can You Tell When an HVAC Filter Is Dirty?

    You don’t need laboratory equipment.

    Remove the filter according to your system’s instructions and actually look at it.

    Some discoloration over time is normal. What you’re watching for is substantial accumulation of dust and debris across the filter media.

    ENERGY STAR’s guidance is refreshingly straightforward: if the filter looks dirty after a month, change it. (ENERGY STAR)

    Also pay attention to how quickly your filters become dirty.

    If you repeatedly find that they’re heavily loaded after six weeks, waiting 90 days because that’s what you read somewhere doesn’t make much sense.

    Your house has already given you the answer.

    📐 How Do You Find the Correct HVAC Filter Size?

    Start with the existing filter.

    The dimensions are usually printed along the edge of the frame.

    You’ll typically see three measurements representing:

    Length × Width × Thickness

    The EPA notes that residential filters come in various lengths and widths and commonly range from 1 to 5 inches thick. The filter should fit snugly without needing to be bent or crushed into place. (US EPA)

    If the old filter is missing or you’re uncertain about the size, check the HVAC equipment documentation or filter cabinet.

    And before removing the old filter, notice the airflow arrow printed on its frame.

    Install the replacement in the correct airflow direction.

    Taking a quick phone picture before pulling the old filter out can save you from standing there five minutes later wondering which direction it was facing.

    Ask me how homeowners learn that trick.

    🏠 A Simple HVAC Filter Routine That Actually Works

    If you want one rule that’s easy to remember, use this:

    Check your HVAC filter on the first day of every month.

    You’re not necessarily changing it every month.

    You’re checking it.

    It takes about a minute and quickly teaches you how filters behave in your particular house.

    You may discover yours routinely needs replacement after a month or two.

    You may find that your filter and system are designed for a longer interval.

    Either way, you’re making the decision based on your equipment, your filter and your house instead of a generic internet schedule.

    And during heavy heating and cooling seasons, that monthly check lines up directly with ENERGY STAR’s recommendation. (ENERGY STAR)

    The Bottom Line: How Often Should You Change Your HVAC Filter?

    So, how often should you change your HVAC filter?

    There isn’t one magic number.

    Manufacturers commonly recommend replacement around 60 to 90 days, but actual filter life varies. ENERGY STAR recommends inspecting filters monthly and changing them when dirty, with three months serving as a general maximum baseline in its homeowner guidance. (US EPA)

    The Dad Approved version is even easier:

    Check it every month. Change it when it needs changing.

    If your household consistently dirties filters faster, shorten the interval.

    If you’re unsure which filter size, type or MERV rating your equipment can handle, check the manufacturer’s documentation or ask a qualified HVAC professional.

    Your HVAC filter might be one of the least exciting things you own.

    But considering how much money you’ve got sitting on the other side of it, giving it 60 seconds of attention every month isn’t a bad trade.


    Clean and dirty 16x25x1 air filters labeled for comparison. change your hvac filter before this happens
    A clean filter beside a visibly dirty used filter highlights when replacement is needed.